Monday, January 31, 2011

Reasons For Swollen Nipples In Dogs

FEBRUARY: MINI MINUTE & more ... Template


Already February! Scrap for the team Rendezvous is an opportunity to address a new theme. We hope you enjoy it ... this month will be devoted to mini! But not minis that require hours and hours of work, sophisticated equipment and a bunch of supplies, no minis simple, easy, economical and will not take you much time. You may already know some, this is an opportunity to remind you, and you will discover more as we will show you several minis throughout this month.

We invite you to attend our challenge " Favorite " also for minis, then please pas à nous montrer ceux que vous aurez réalisés. La date limite de participation est le 27 février ... mais si, mais si, vous aurez le temps, ils sont tellement rapides à réaliser!


It's already February! Our team would like to introduce a fresh theme for this new month: minibooks! We hope you will like it. Forget time-consuming, complicated minibooks that require sophisiticated tools you don't have and tons of supplies, our minibooks will be simple, and easy, cheap and quick to make. Maybe you've already come across some of them and you can try them again, but some of them are quite unique... you'll soon find out. We will be showing you different minibooks this month.

Show us you take it o minibook and take part in our "Favorite" challenge! The Will Be February 27th deadline. You've got plenty of time, they're all so quick to make!


A quick note on the implementation of the program this month: from this month, the second week of each month will be devoted to album " 52 weeks. During the second week, you will find Kate, the pages of the team ... and some surprises.
A quick update
is this month's program: From Now On, The second week of Each month Will Be the " 52-week album" week. Kate will be back, The team members Will Show You Their pages ... and more!


The last week of will week "Carterie" with a special guest you will discover from 21 February.

The last week of the Month Will Be The cardmaking weekend ... Meet our second guest on February 21st!

The Movie On The Witch Of Blackbird Pond

double page

Hello all! for my last visit on Monday, I propose a two-page template realized from one of the pages of my project! This template therefore incorporates frames Polaroid (number 9) and the title I put on each of my pages. I hope you enjoy it, please leave a link to your creations in the comments of this post!

Hello! This is my last weekly appearance this month and I Would Like to Introduce a RFP template i used in my project. It has 9 Polaroid Frames And The title I use for all my pages.
I hope you like it ... if you use it, please post a link to your blog comments In The.


Starting today, the appointment "Template" will no longer weekly (you already have a good base to start ... if you have not already ;-)) : So I'll meet you on time throughout 2011 to offer templates and see where you stand with this project. See you soon!

From Now On, We Will not Have A weekly Monday template Any More, Because You Already Have A Few You Can Use templates to start your project. Goal I'll be back Many Times All Through the year to offer you more templates, so check out this blog!

Saturday, January 29, 2011

C Form Not Received Letter

Our Takes on Sabine's cards: hand 2 - cardmaking

Hello Friends! Here we are again With A second and last edition we Sabine's cards.
Hello Friends! We're back with a second and final interpretation of Sabine cards.

***
alexandra

I Have enjoyed Sabine's technical So Much That I made this card thinking of him or. Now It Does not go all the way out, The Circle acts more like a pocket here:


I so loved the art of interpreting Sabien I created this card with her in mind . Sabine, if you pass by here, "you inspire me ;-)
This time, the message does not appear from the other side of the map, the circle joueant the role of a Foureau.


***
Pascale

For this second card, I tried to integrate the central motif in the message. For the second
card, I Tried to Make the centerpiece of my card apart Of The sentiment


I'm here to explain to our readers that English does not work in English!


This is a card for my nephew's second birthday. What is says is "You are 2" Which works fine in French Because We Actually use Words That mean "you have 2 years" but I'm sorry to say Would not it work in Français ... You Could try to use "you are" on the left, 2 aces keep a centerpiece, and use "today" on the right.


***
Virginia

soon as I saw the charts of Sabine, I immediately thought of the possibility of replacing the message with photos.

As Soon As I saw Sabine's cards, I Have Thought That I Could Change the Message Into pictures.

So I put my idea into practice to make one (Hot!!) Greeting card ... And here's the result: a very simple card to draw attention to the pictures.
So my idea
Became reality and I made a (last) "happy new year" card ...
And here it is: a very simple card to focus were the pictures.

Left side ...


... and right side!


I hope these cards will make you want to participate and try this technique! I hope

All These Cards Will Give You Ideas and You Will play with us and try Sabine's art!

Thursday, January 27, 2011

Acne Meds Give A Chemical Burn?

WEEK3 (DT's pages) - Week3 (ESMP team) Our

Here are the pages of the team for the third week January
***
Pascale

This week, they are my hyacinths and my iPod that inspired me my color combo ... with at least one color very unusual for me, pink!. I associated with a beige or taupe that you will recognize if you like the papers Kesi'art. On the left page, the frame is too bad mole but I set my scanner and you do not see very well ... is better on the next page! My

color combo this week WAS Inspired by my iPod & the hyacinths I Grew from bulbs. I used a color I Hardly ever use: pink! The Other Color Is a kind of greyish beige I like a lot, & the frame around this That first page is EXACTLY color, I only messed up the Settings When I scanned the page and it looks weird ... The next one is better!

I had a lot of photos to put this week, so I opted for installation type "film" on the left page and a strip of three photos on the right page.
I had a number of pictures I wanted to use this weekend, so I made a filmstrip-type glue left on my page and Another larger collage on my page right.


is the framework in its real color, and this week my band with the number of the week was dressed in pink ... If the middle picture is fuzzy, it is quite normal. My daughter prévenue qu'elle ne m'adresserait plus jamais la parole si je publiais cette photo sur le net...

Here is a better picture that shows the actual color of the frame. This week, my "week number" strip is pink! See that blurry picture in the middle? Well, it is not blurry on my page... but my D.D. warned me she would never ever speak to me again if I showed that picture to anybody outside the family!


***

Virginie

At the beginning, I wanted to use Katell's template... well, at the end, it is not exactly that!!!

Au début, I wanted to use the template Katell ... good, finally I deviated much!


Left page :

This week, I Added some pictures On the left top (to keep The Idea Of The strip of pictures is Kate's template). Like my first two pages, we can find The Number of the Week, The journaling and a horizontal strip of paper.

This week I added some pictures on the left page, to keep the idea of the band photo template Katell.

And then, as the first 2 pages, one finds le numéro de la semaine, le journaling et une bande de papier vertical.


Right page :

Lots of pictures on this page... The colours came easily, I just used the same as the ones which are in the color pictures : blue and yellow.

Do you recognize Katell's template? it is difficult!!!

This week, I didn't use a collage. I tried first to do my page on Photoshop (like if it was a digital page) to see how it can be done and then I printed my pictures. I pasted the biggest one foam to add some relief. Then, I added a square of paper, cardboard Some, a brad, homemade year tag ... well I played with My papers! A tone is tone title, and my page is finished!

Many photos on this page ... The colors came very easily, I just used those in the photos colors: yellow and blue.

Do you recognize the template Kate? it's hard!

This week, I have not used Picasa collage. I first tried to make my website in Photoshop (as if it's digital) to how I could organize it. I then printed my pictures and pasted on the largest square foam to give relief to the page.

And then I added a square of paper on which I had fun with cardboard, a brad, a tag round homemade ... Finally, as a tone on tone has come to finish the page!


Here are some details ...
Here Are some details ...


***
alexandra

Left page:

I really wanted to showcase this picture of WITH ALL icts gorgeous winter tones so I enlarged it and something has not Contrasting pp to accentuate the "blue effect".

I wanted to focus on this picture which has beautiful winter colors, so I enlarged and chose a paper from the same tone to accentuate the "Big Blue"


right page:


I Had Quite a bit to write once again so I thing to frame my journaling With The strips of pictures (collages made Under Picasa).

I still had a lot of things to say so this time I thought of a sandwich: photo collage / journaling / collage photos. (Collages in Picasa)


Wednesday, January 26, 2011

Selling Blood Plasma Orlando

Takes on Sabine's card!

***
Pascale
We did not at all consulted in making these cards, but on arrival we get all three with Kraft! Although

We Never Discussed The Card Together We Were going to make, ended up using all weekends Kraft colored cardstock!


Originally I planned to just stick my flower on the scalloped cutout in the printed green, but my text was too long compared to my central theme, it took me to add un cercle supplémentaire...
At the beginning, I thought I would just use the flower on the scalloped p.p. circle as a centerpiece, but it didn't work out because then my text was too long, so I added an extra circle to balance the whole thing:


***
Virginie

I decided to make a "welcome baby" card... I wanted to do a very sweet card so I used soft colours : kraft, white and a little bit of yellow. The butterfly on the circle reminds me of the baby in his mummy's belly!!

J'ai décidé de réaliser une carte de bienvenue pour un nouveau-né... I wanted it soft and sweet, that's why I used pastel colors: kraft, white and just a touch of yellow chick. I realize now that the butterfly landed on his round makes me think of the baby in the womb of its mother!


Because I Do not Have foam tape at home, I found Something Else To Make The Track For The strip of paper! Simply I Used a thick cardboard, hehehe, We Do What We Can!

Since I did not have a 3D foam tape, I used the system D!! My central motif is therefore based on strips of corrugated cardboard ... we cope with what can! That is also the scrap!


Then, When I Pulled The strip of paper, it Disappeared from under the central embellishment ... Even With The brads.Hmm 2 ... not good!

So, I pasted strip of paper The cardboard was (Thinner Than The first one I used): Malthus, The Strip IS Stopped By The brads, Which works like a "door stop" ;-) goal pour la strip of paper! It Was My personal trick!

And then when I was sliding the strip bearing the text, it disappeared entirely on the grounds of the medium, despite the presence of 2 ends with brads. So hop, nor one, nor two, I stuck the tape on a cardboard (slightly thinner than corrugated cardboard) so that the brads could do well against the buffers of the middle ground and prevent the text from slipping ... That's my little personal tricks!


***
alexandra

I love this art so well Demonstrated by Sabine! To me, this type of cards is perfect to showcase calls a stamp. I find myself going-through my stash of "old" stamps and Giving Them a new life. Thanks Sabine!


supplies Kraft and white cardstock: Archiver's, red cardstock: Bazzill; sentiment stamp: Hero Arts, Children's stamp: unknown (Made in the USA); Embossing Folder: Cuttlebug .


I really like this technique so well demonstrated by pull Sabine in yesterday's article. In recent days, I have fun like a kid with my "old" stamps for me because this concept is perfect to give them new life. Thank you Sabine!


We'll be back With A second take is Sabine's Cards At the End of the week. In the interim, WE thank you for your sweet comments and encourages you to play along ;-)

We will return this weekend for a second interpretation of the challenge of Sabine. In the meantime, we appreciate your comments and invite you to play with us ;-)


Tuesday, January 25, 2011

Clots Before Period -during

GUEST-STAR - CARDS / CARTERIE

Hello, I am writing
of Belgium, the country's small and flat Chocolate, beer and surrealism. I would also like almost surreal to have been asked by Pascale, Alexandra and Virginia to inaugurate the section postcards, which I I have long felt so "zero" in this field, the first time I had to send a card to a scrapper, I bought ...

Hello, I'm writing from Belgium
, this small, flat country home to chocolate, beer and surrealism. And Indeed, Being Asked by Alexandra, Virginia and Pascale To Be Their first guest for this new feature cardmaking Felt Rather surrealistic Because for a long time i thought i was terrible at cardmaking. The first time I feel a card to a friend scrapbooker, i actually bought it!


Since it's true I'm caught up well, and I learned the pleasure of creating around these small squares or rectangles of paper. What I appreciate most is the freedom to discuss all topics, all techniques, without having to devote time or resources for such a page. Few cm2 of paper suffice for new experiences: inking, embossing, sewing, volume effects and pop-ups, the possibilities are endless, and the constant pleasure!

Since That Time, though, I Have Been learning a lot, how much fun Namely It Is To Be Able to create cards, small pieces of paper With. What I love MOST IS BEING FREE to address "any use" any topic and technique and not HAVING to Spend A Lot of Time Many uses gold supplies, i would have for a regular album page. With a few "square inches of paper, I Can Experiments with inks, embossing, sewing, or 3D pop-ups. There Is Such A wide range of possibilities and so much fun to BE HAD!


The card shop is for me as a "greed" of the scrap: a fun little easy, quick (not about to spend three hours on a map!), A revival for inspiration when she fled, or else the opportunity to try "urgently" a new paper, a new buffer for which we can not wait ...
tends to look
I've cardmaking scrapbooking candy ": easy, quick (There's no way I'm Spending Three Hours was card!) And so nice! It Help Me Find inspiration when I'm stuck, it Gives me the perfect Opportunity to try this new gold patterned paper this new stamp I've just Bought and I want to use so badly!

is the option I preferred the first appointment postcards. An irresistible urge to cheerfulness, like a color-spring actually! - And a pretty good reason sympa, add a small effect, extremely simple, text slides, and that result in a realistic fresh, all dapper and ready to start a mailbox for the first rays of sun ...

So, for my first post cardmaking, I wanted to Bring You happiness and bright colors - well, a hint of spring! A charming pattern, a feeling one has (very easy to make) sliding strip, and There you are: a lovely card, feels ready to Be!


They shoot the little bit of ribbon to the right ... Just pull
The Ribbon On The Right ...
The effect of small hidden text, if unspectacular, added a small note of fun and always very pleasant! The principle is simple: the strip of paper is just "stuck" between two pieces of tape on the back of the 3D pattern, which serve as a guide:

... And The Hidden Part of the IS sense Revealed. Nothing spectacular, maybe, it is fun and aim Bring That Little Something to a card. It Is very easy to make: Two pieces of foam adhered to slap The Back Of The Piece Of The paper With The pattern on it, so as to make a track pour la strip of paper.


This is a little trickier, is to position the text on this tape so that it appears exactly on each side, without a party overflows or remains hidden. For those who might be tempted, here are the instructions ... The tricky bit
Is How to Position Word On this strip of paper so optometrist APPEAR EXACTLY WHERE YOU WANT. This Is How You Do It:


First prepare background (for me a very colorful paper from Cosmo Cricket), and a deco about 3 X shorter: my card measures 15cm, my stamp lady on her scooter in a little under 5. Print (or stamp, or write) a simple paper on both sides of the text, dismissing them without concern for spacing. None can be longer than 5cm from the central motif, and both must be of roughly equal size: for example, "Merry Christmas" on one side, "Happy New Year" on the other.
First, You Need to prepare your background paper (i used this brightly colored Cosmo Cricket pp) and a central embellishment about One Third Of The width of your background. My card is about 6" across and the stamp I used (the lady riding her scooter) is just under 2". Then, stamp, print or write your sentiment on a piece of paper. Write it in two parts, the space you leave between them does not matter. Be careful though, none of these parts can be longer than your central embellishment, and it's best if both of them have a similar length. For example, you could have "Merry Christmas" on one side and "Happy New Year" on the other side.

Ensuite positionner le motif après le texte de gauche, et mesurer en ajoutant un cm avant le texte. Ma distance jusqu'au bord du tampon : 4,2cm

Next, place the embellishment after the end of the text that will be on The left side, and measure from 3 / 8 "before The Text To The Side Of The embellishment. We Used metric here: 4.2cm.


I report these 4.2 on the strip of cardboard sliding (its width is between ribbons 3D, its length to be determined)
Draw a mark at your strip is 4.2cm. The height of this strip Is the space you left Between the Two Pieces of foam tape, tea length Will Come Later .


Now I put the buffer just before the right text ...
Now, Place The embellishment Just Before The Part Of The feeling That Will Be On the Right:


... then the strip of cardboard on it, so as to pass to the left of the pattern just cm left before the text:
Then place the Strip on top of it, Taking Care to leave 3 / 8 "Before the embellishment:


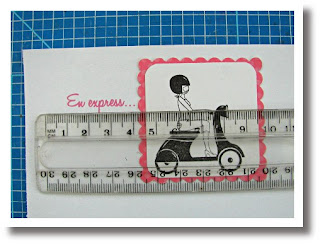
Draw a line on the strip again, this time to 1 cm from the right end of the text on the right. This determine the length of the strip, here 10.5 cm. The cut in this location, then come and paste on each of its ends two pieces of text. It does not care junction, we will not see! Another mark
Draw On the Strip 3 / 8 "after the right hand Of The feeling (10.5 cm here). Then cut out The Two Part of the feeling and
em adhered to The Strip. Do not worry about The Where They instead meet, That Will Be hidden.


It remains to be determined "a little thing into relief" at least one end of the strip, to facilitate holding it for traveling. I expected small pieces of tape held by brads, where small holes ... The only thing left
to Do Now Is To add a brad or eyelet Year With A ribbon n The Strip Is Easy to pull. ..


the decor, with a paper like there is nothing to add, or almost: I still fell for three small rhinestones wisely aligned. Originally white, they have been colored with a permanent marker. You've already seen the result:
As I Used a brightly colored PP, all I Needed to add WAS three little glimmer dots:
Finally, because this card is still very girly for a blog C & , S, and then because it's almost Valentine's Day, an "indispensable" to the card shop, I prepared a second card on the same system, more sober one. Although ...
Since Valentine's Day is coming soon, and it's a time of year WHERE cardmakers are busy, I Made Another card using the Same technique:


In cardmaking pleasure is twofold: for one who creates, and then as the receiver. Added to the satisfaction of using a nice way of falling papers, often clutter our drawers scrapbooker and pride to send in all occasions, absolutely unique and personalized greeting!
Am I convinced you?
cardmaking Makes two people happy: The Card and whoever made whoever found it in Their mailbox! Plus, it helps you get rid of scraps of paper That thesis keep piling up your desk and you-you-can send Some really unique cards!


I still have yet to thank Alexandra, Virginia and Pascale for having so kindly accepted, and I tell you soon maybe here or on the blog Dough Scrap .
Finally, I Would Like to thank
Alexandra, Virginia and Pascale HAVING for me here and I hope we'll Meet Again, this is on my blog or blog Scrap dough.


Kisses of flat land,

Sprint Mobile Filter Internet


Hello Friends! Scropines Hello!

We Hope that you enjoy our new weekend of cards And That You Will play with us! Yesterday, you weekends Explained How to participate to Our challenges. It Is now time to let you know When The Challenge Will end. You Have Until The 27th February to share with us your card (s). And On The 28th We Will announce our "favorite"!

We hope this new "week cartery" please and inspire you turn your cards! Yesterday we told you about how to participate in our challenges. It is now time we tell you the deadline for participation. You have until Feb. 27 to share with us your (your) card (s). The next day we'll announce our favorite card shop!


Tomorrow We Will Show You o Takes on Sabine's cards.
Tomorrow we'll show our own interpretations of the cards Sabine.

Sunday, January 23, 2011

Average Dress Size American

FREE TEMPLATE - katell & general info

Again Katell, to present the new template Monday ... again and again on an idea by Alexandra ;-))
Hello there, then this is Katell, again to share with You Yet Another Digital alexandra's template is based skit.


I hope that these templates to help you layout your projects! Remember that the hardest thing to start ... ;-)) once we found the "common thread" of our project all the pages are made much faster. This thread can be for example ... a similar background on each page (as Alexandra chose a plain white background), a layout identical (eg tile or template repeated on all your pages), a particular font .... etc! for you to choose to take ownership of this project and achieve votre album, celui qui vous ressemblera et celui qui racontera vraiment votre année 2011.

I sure hope you find these templates helpful. Don't forget that the hardest part is to give it a go, once you have found your "common thread" I think you'll find the whole process of scrapping a page a week a lot easier. That common thread can be anything really form a particular font, to a unity of color or background it's the beauty of it: find your voice so you can make a album that truly resembles YOU!

Personnellement, je suis bien le rythme : j'ai choisi de répéter des cadres photos style polaroïd (car je fais beaucoup de photos avec mon téléphone et son appli Vignette), un grand journaling and a title that I made myself with 2 fonts. Here are some details of my first page: I'm happy to

deferral That I Have Found My Rhythm: all my pictures will be "instant" since I'm Estaing Most Of Them With My iPhone has a long title and journaling Composed of Two fonts. Here are a few "details of my first pages:


I hope that all these templates and our pages will inspire and motivate you! Hope you're
Enjoying the templates so far!


***

Thanks Kate for these templates and tips we present you for almost one month! Thank you for
Katell All That You Have Done So Far!

In our turn to speak to tell you a little later this week ... We'd like to
Take This Opportunity to share information regarding a few "The posts to come ...

This year we decided to devote one week a month in the postcards. To do this, we get every last week of a scrapper who will present ideas for cards based on a theme, a sketch, a color combo ...
This year, we've Decided To Make The Last Week of Each month a "weekend card". We'll Have The Pleasure of Having a guest ("the guest card) Who Will share with us Her ideas, cards ... Her

And it starts tomorrow with our first guest! We hope you'll visit the many ;-) you
Our very first guest Will Come tomorrow and hope you'll come weekends too ;-)


Then, after a January dedicated to the "2011 52 pages" we will return next month (ie in a week!) with a different topic each month ...
There will be "guest stars" of tutorials, share files and all that in a good mood! We warmly invite you to join us! The theme for this
month Was The big project of "2011 in 52 pages," Now That January is coming to a close we'll go back to dedicating a month to a Particular Theme With A Few Twists goal!

If you wish to participate (whether about "card shop," is the theme of the month), you can just post the picture of your achievement in your blog or virtual gallery and leave us the link a comment on our blog. (and if you do not blog or online gallery, send us a photo on our email address).
We will set up a gallery with your work so that everyone can admire your masterpieces! If you'd like
to Participate (theme for The Monthly The gold cards) and You Have A Blog, all you'll Have to send us a DO IS Toward direct link your project. In the Box That You Did not Have a blog, picture feels to us Will Work Just As Well (500 res.)

At the end of the month we each determine our favorite ... 3 participants will receive a card from one of us 3!
To participate, you'll have about a month and a week for the card and about a month to month about ...
But do not worry, every month, we'll tell you a clear deadline for participation!
We Will reinstall our "favorites" and announces Them At The End of the month. Three participants Will Receive a card from one of Our Team! We Will indicato The dates and themes in due time of course.

And what about the Project 2011 in 52 weeks?
We'll focus on it once a month where we will find Kate and where we can show you the progress of our albums, the views of other scrappers, ideas for do not get tired in this long-long project. ..


Hoping to see you at our next appointment, we wish you a wonderful week! We hope you'll continue
to come and visit us! Have a great weekend!

Thursday, January 20, 2011

Vba Pokemon Shiny Gold Computer Cheats

Week 2

Hello!
Hello!

With a little behind on my accomplices, I present my two-page spread for the second week of January ... I'm
Slower Than my two partners in crime, here are my purpose pages for Week 2!

I stayed true to my idea of two colors that match the mood of the week, and my band with the number of the week.
I Decided to stick to my 2-color theme Reflecting the mood of the Week, and to my strip With The week number on it.


Very easy for my side journaling (parts deliberately blurred), but I'm very happy with my photo of rain on the windows of the car (we take photos we can!) And my label Bloomin Studio, which is part of new printing plates that I recommend. A very simple

page with my journaling for That weekend on it. I'm very Pleased with My picture (my car window was very rainy day ... well, then this is about my daily life, is not it?) And my Bloomin Studio tag.


A little editing pictures on the right page, with some Some good moments of the weekend, two strips of paper in the colors of the week, a small tab Bloomin Studio again, and voila!


Just a collage is my other page, With memories of the nice weekend Spent weekends with my sister and Her Family Who visited us, Two strips of patterned paper in Keeping With My week's color theme, Another Bloomin little tag ... and voila!


Wednesday, January 19, 2011

Wrestler Singlet Supposed To Underwear

WEEK2 DT's pages - Week2 (pages of the team)

Hello Dear Friends! It's Wednesday and it's time for us to show you o double pages for Week 2 ...

Scropinettes Hello! We're already Wednesday, it is time for us to show you we double pages Week 2 ...

* Virginia *

This week, Alex and I Have Decided to Illustrate Katell's template (see previous post). I just changed Few Things ...

This week, Alex and I decided to illustrate the template Katell. I just change a few things ...

Left page: The I Kept On The journaling right of this page & the lines at the top left. I just Added few "embellishments and The Number of the Week On The Left, With The vertical strip of paper (as in my Weekend page 1).

On the left page, I kept the idea of journaling on the right and a few lines of text at the top left. I only added 2 or 3 embellishments. I kept
like last week the number of the week while the left and the vertical strip of paper.


Right page: I wanted to use more pictures Than The template Indicated this page so I Turned Into year envelope. I changed aussi The Number of pictures Because The Template Was Made for a 12x12 "page and mine IS 8x8.
To Bring life to this very simple page, I Tried to mix black and white pictures and color pictures.

On the right page, so there are pictures. But as in the template, I could not put all the photos I wanted, I turned this page in an envelope in order to drag my Picasa collage of the week.
I also changed the initial number of photos as the template for a page that was 30,5 x30, 5 and mine is 20.3 x20, 3.
To bring some life and movement to this page very simple, I chose to mix black and white photos and color photos. Butterflies and make the title come as a bit of movement ...


From a little closer and more views ...
details and close-ups ...


***
alexandra

Our Goal Today is to show to the "traditional scrappers" out there optometrist uses a Canon digi template in Many different ways. (I apologize for the Poor quality here.

With two double pages based on the template Katell, Virginia and I wanted to show you that the scrap paper may well rely on a digital template.


Left page: I Followed The original sketch and let The Colors From The bonding dictate my choice of pp (Anna Griffin's)

Left: I followed the sketch starting very close and I let the colors of the mosaic of pictures to guide me for selecting papers (Anna Griffin's)


Right page: With year 11 picture collage (Picasa) I Felt It Would Be Best to balance it with white cardstock (Which Is going to be my base for all of my duplicate pages anyway). I did not want to break the Lines With A title so I printed "Week two" is the yellow strip of paper. This way, it functions Two reservations: The gluing it closed and it bears le titre pour la double page.

Opposite: One can count 11 pictures in this mosaic made in Picasa. She brings great color and detail that I did not want to "crush" by adding a background color other than white. (The white Bazzill will anyway the basis of each of my double-pages). The first week, I included a title on your tone, this time even a tone-on-tone would break the lines and diverted attention. So I printed "week two" on a strip of yellow paper. Seems it has two functions: to close bonding and that of the name.


We value your comments and Would love to see What You Do With Your Week With Any 2 or templates We Have Provided here is the blog. Thanks ;-)

If you have questions, a page of the second week to share or if you used a template to a different page than a week, we'd love to see them! Feel free to share, your comments make us advance, thank you ;-)

Monday, January 17, 2011

Dress For Rent Manila

Brushes & a free template

Katell Again, for our traditional Monday Dating ;-))
Hello, This Is Kate for Our Monday post!


Today I'm going to save money! I assume you are using, and then buy, the Wordart / Securities stickers to put on your pages? This is a way to use indefinitely, by paying once the pack! tempting, no??

Today, I'm going to help you save money! I expect you buy stickers or rub-ons with text we use 'em to be your pages. Here Is A simple way of using Some of 'em as Many Times as you want while Paying just an ounce.


Many shops sell Digital Scrapbooking brushes, best known as the designs are obviously Ali Edwards (famous for paper scrappers) or Paislee Press (best known digiscrappeuses).

Many stores sell digital scrapbooking brushes gold Thing Called "WordArts. The Most Famous designers include Ali Edwards (Whom you know Probably Even Though You're Into paper) gold Paislee Press (famous with digital scrapbookers).


So first step, you buy a pack you like (usually they are all under $ 4 and are very complete). ... Such as this pack:

How do you go about it? First, buy a pack you like (They Are Usually Less than $ 4), Such as this one:


You download it to your hard drive in your documents (although locate where you put them ;-)). We can use them!! we could use them as brushes but it's frankly more complicated ... we'll just use fichiers.PNG provided!

Download it to your computer (remember Which file you Downloaded it to). We Can Use Them as brushes, goal This is a bit Complicated, so let's use the. PNG files INSTEAD.


You open Photoshop or your app, and you open a document the size of your page if you wish for example to print directly onto your paper, or you open the photo that you would like to wordart:

Open Photoshop and create a document, Choosing The Size you want if you are going to print it, or Open the file containing The Picture You Want To Use The brush is:


File> Open> browser window


Then you will "find" one of Wordart / title previously purchased:
File> Import> browser window> retrieve a pack of WA (they all appear) and saved in your documents

Then you go get one of The Brush / wordart / titles You Just Bought and Stored:

File> Import> browser window> Choose the brush you want


You can zoom, move your WA with the first tool (the one with the 4 arrows) in the toolbar on the left and clicking on one corner of WA.

You Can now enlarge and move your Wordart With The first tool In The left toolbar (The One With The four arrows), Clicking On One Of The Corners Of The Wordart.


There!! only have to print your Photo / project is simple .... no? ;-)))
Here you go! All You Have to DO IS print it out.


You can color it if you want to put a shape on it, and by the famous CTRL + G in Photoshop and CTRL + ALT + G with photoshop elements (see the tutorial "Using a template") .

You Can aussi color it using CTRL + G in Photoshop and CTRL + ALT + G in Photoshop Elements (see tutorial "How to use a template").


*** And like all Mondays of January, I propose a template! this time it's a double page template on an idea of Alexandra. And like

Every Monday in January, I have a template for you. This Time, It Is a DP was based sketch by Alexandra.


DOWNLOAD HERE DOWNLOAD HERE

great week all! Have a lovely
week!